

# Entry
FastAPI goes well beyond a basic Python API library. It has become a broader ecosystem that many developers rely on to build state-of-the-art web applications, especially for artificial intelligence and machine learning projects. One of the reasons FastAPI has become so popular is its speed, simplicity, and developer-friendly design.
Image from FastAPI Cloud
Now with FastAPI Cloudimplementation also becomes much easier. Instead of wasting time configuring servers and deployment pipelines, you can deploy your application in seconds using the FastAPI Cloud command-line interface (CLI). Setup feels basic, lightweight, and much closer to the seamless experience developers expect from state-of-the-art managed platforms.
At the time of writing, access is still through a waiting list. I applied a few months ago and recently received access, so I wanted to put together a basic guide based on my experience. In this tutorial, I’ll cover the basic setup process and show you how to deploy a diminutive FastAPI application in just a few steps.
# Creating a project
In this tutorial, you will build a basic live metal dashboard using FastAPI. The application will retrieve gold and silver prices from the API, return the data in JSON format and display the values in the browser using a diminutive HTML interface.
Before you start, make sure you have:
- UV installed for the project scaffolding or the latest supported version of Python.
- FastAPI cloud account.
To get started, create a novel FastAPI project using the official setup command:
uvx fastapi-new metals-live
cd metals-live
In a few seconds, FastAPI will generate the project structure and install the required dependencies for you.

Photo by the author
Then activate the virtual environment in the project directory.
On Linux/macOS:
source .venv/bin/activateIn Windows PowerShell:
.venvScriptsActivate.ps1# Adding httpx
Then install the packages that the application will need. We will exploit it httpx to retrieve the current gold and silver prices from the API, and we will also ensure that the standard FastAPI add-ons are installed so that the application runs and deploys smoothly, without missing dependencies.
uv add httpx "fastapi[standard]"This command adds httpx to create outbound API requests and installs standard FastAPI dependencies commonly needed for development and deployment.
# Replacing the default application
Now it’s time to replace the default FastAPI application with the version you will actually deploy.
This is what the default project structure looks like:
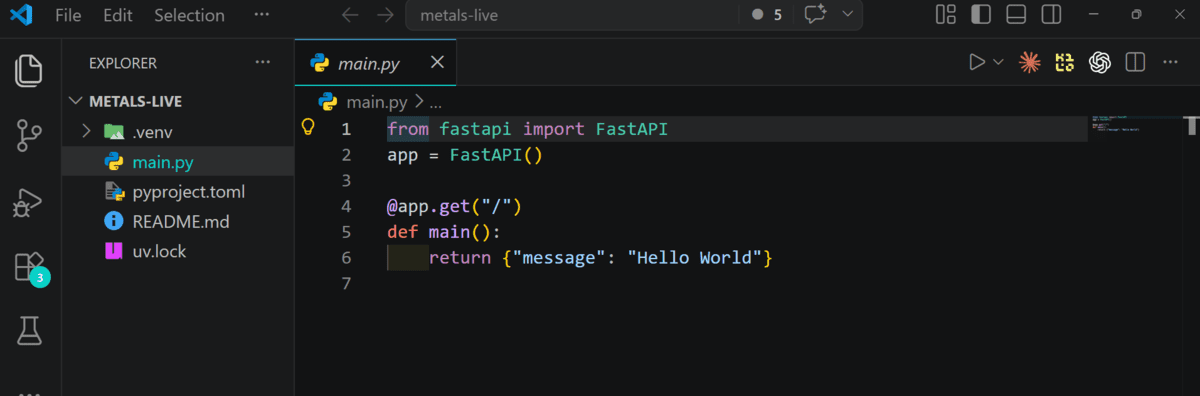
Photo by the author
Open main.py and replace its contents with the custom code shown below. This version does two things: retrieves current gold and silver prices from the Gold API and supports a basic browser dashboard that refreshes automatically every 15 seconds.
Paste this into main.py: :
import httpx
from fastapi import FastAPI, HTTPException
from fastapi.responses import HTMLResponse
app = FastAPI(title="Live Gold & Silver Prices")
GOLD_API_BASE = "https://api.gold-api.com"
async def fetch_price(symbol: str):
url = f"{GOLD_API_BASE}/price/{symbol}"
async with httpx.AsyncClient(timeout=10.0) as client:
response = await client.get(url)
if response.status_code != 200:
raise HTTPException(status_code=502, detail=f"Failed to fetch {symbol} price")
data = response.json()
return {
"symbol": data.get("symbol", symbol),
"name": data.get("name", symbol),
"price": data.get("price"),
"currency": data.get("currency", "USD"),
"updatedAt": data.get("updatedAt") or data.get("timestamp"),
}
@app.get("/api/prices")
async def get_prices():
gold = await fetch_price("XAU")
silver = await fetch_price("XAG")
return {
"gold": gold,
"silver": silver,
}
@app.get("https://www.kdnuggets.com/", response_class=HTMLResponse)
async def home():
return """
Live Gold & Silver Prices
Prices refresh automatically every 15 seconds.
"""What this code does:
- Creates a FastAPI application.
- Retrieves current gold and silver prices from the API.
- Returns data
/api/prices. - It supports a basic HTML dashboard at
/. - Refreshes displayed prices every 15 seconds.
# Testing locally
Before deploying, it’s a good idea to run the application locally and make sure everything works as expected. FastAPI makes this basic with a built-in development server.
Run the application with:
Once the FastAPI server starts, it will generate a local URL for your application and a document URL for endpoint testing.
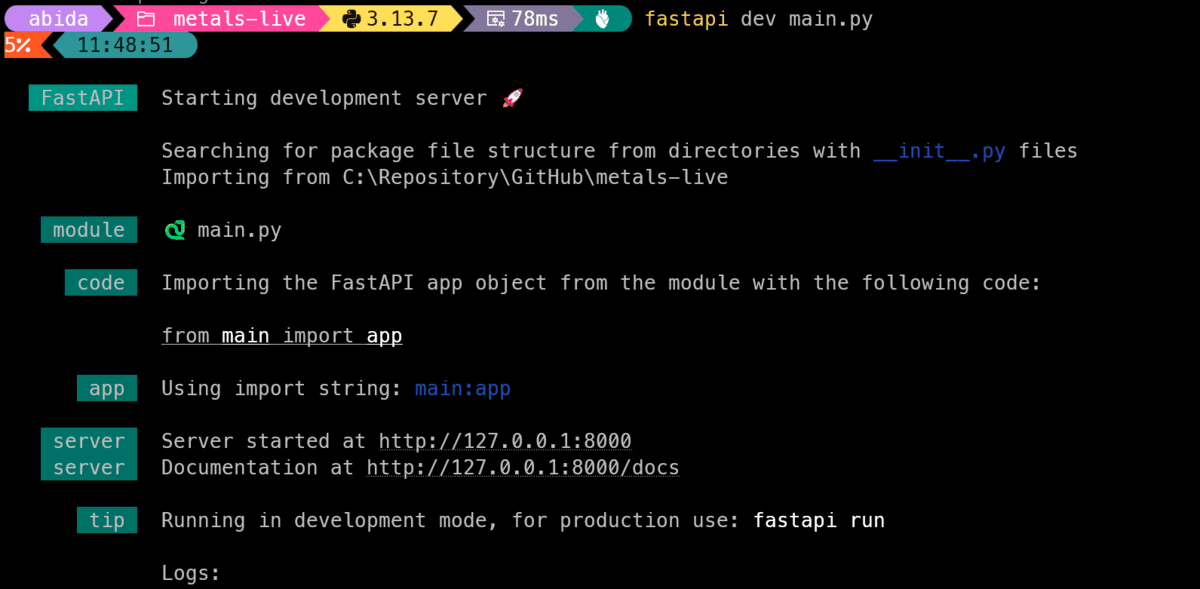
Photo by the author
Open your browser and go to:
You should see a live dashboard showing gold and silver prices. The values will be refreshed automatically every 15 seconds.
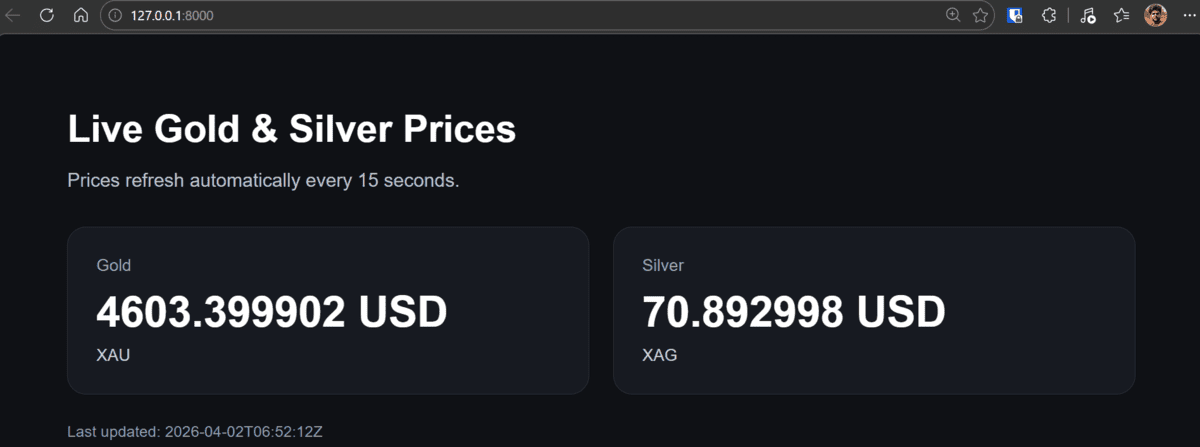
Photo by the author
You can also test the JSON endpoint directly at:
http://127.0.0.1:8000/api/pricesThis is especially useful if you want to check the raw response or later connect the data to another interface or application.
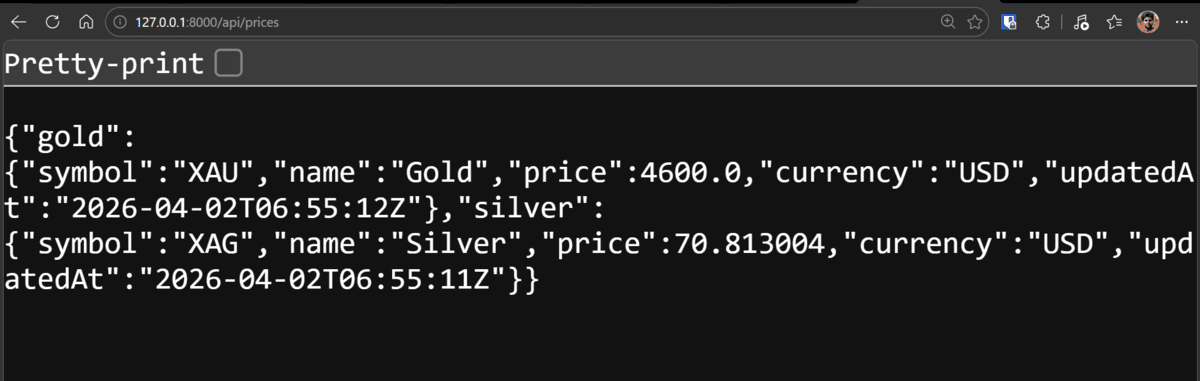
Photo by the author
# FastAPI cloud deployment
Once your application is running locally, you can deploy it to the FastAPI cloud. The implementation process is very basic and starts with one command.
Start:
The CLI will guide you through connecting your FastAPI Cloud account and completing setup. During deployment, you may be asked a few quick questions such as team name, application name, and deployment settings.
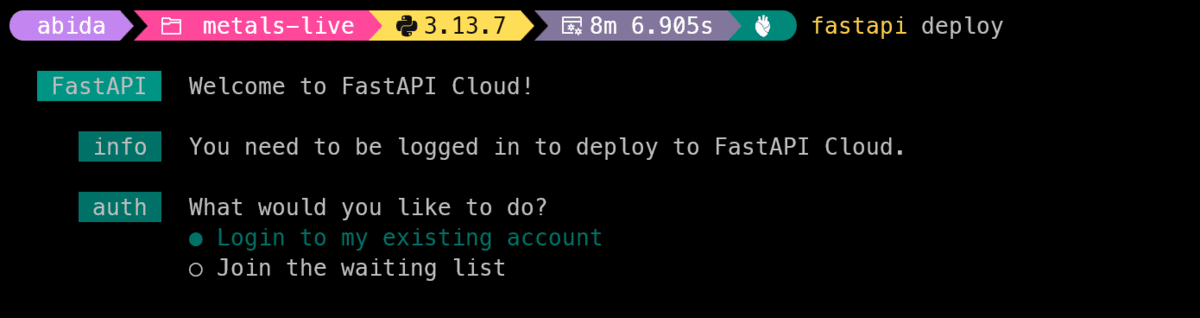
Photo by the author
Once you do this, FastAPI Cloud will build and deploy your application for you.
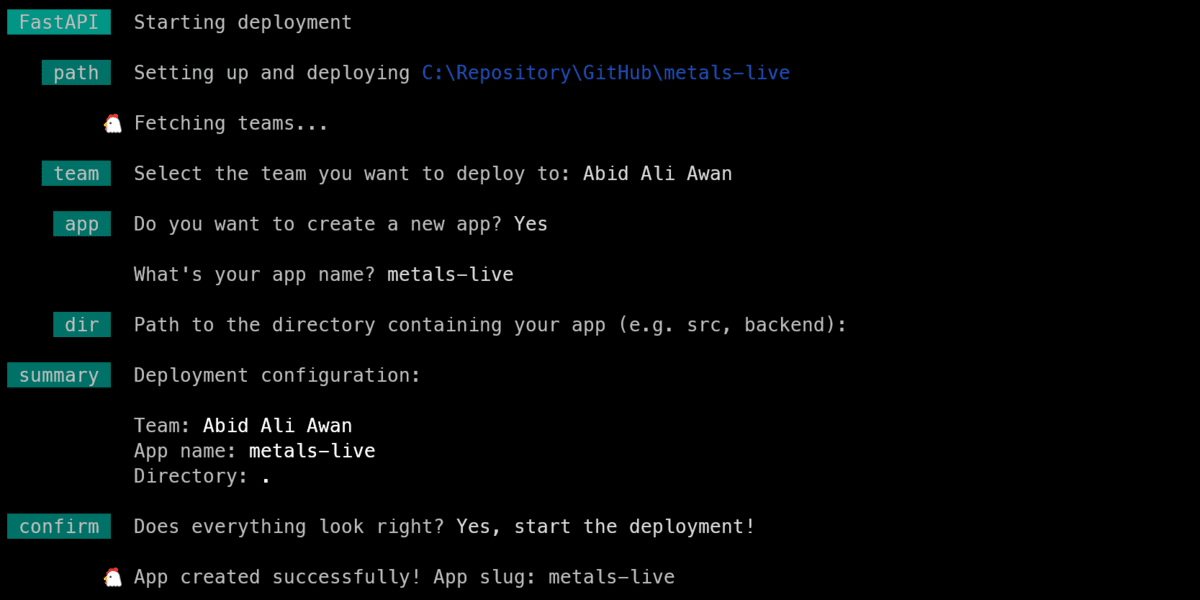
Photo by the author
Once the deployment is complete, you will receive the lively public URL of your application – for example:
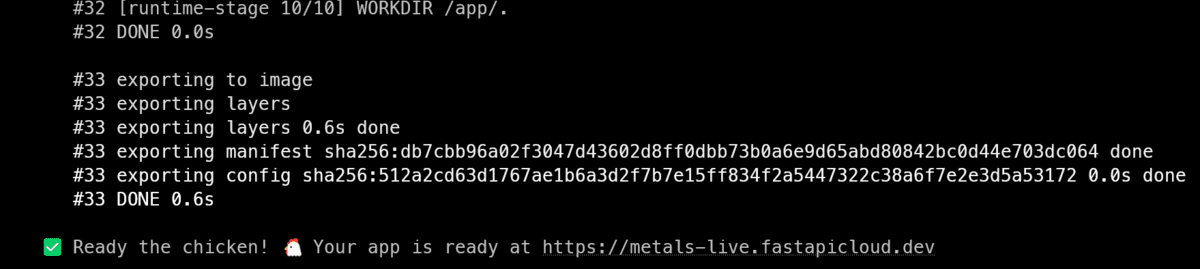
Photo by the author
https://metals-live.fastapicloud.dev/FastAPI Cloud also provides interactive API documents at:
https://metals-live.fastapicloud.dev/docs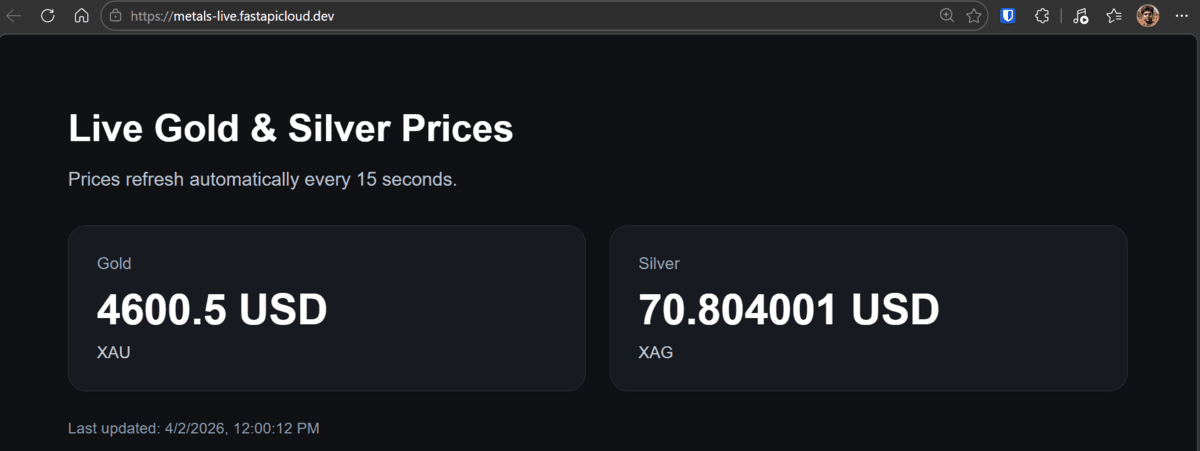
Photo by the author
This is useful because you can test your API directly from the browser without the need for additional tools.
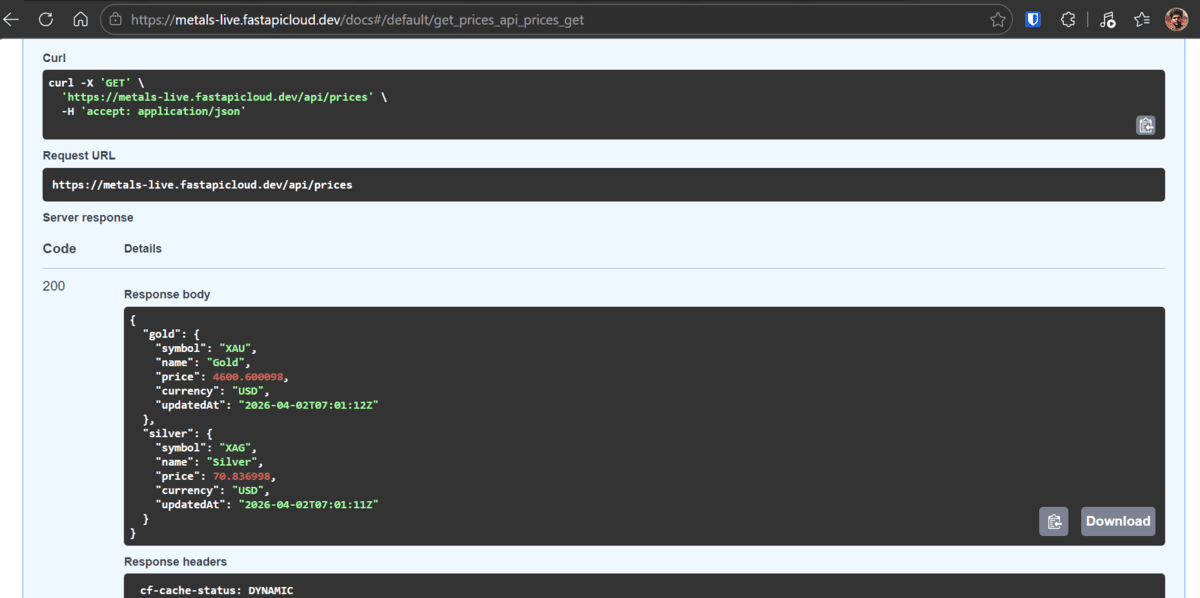
Photo by the author
# Application monitoring
Once deployed, you can exploit the FastAPI Cloud dashboard to monitor your application and check its logs.
To view logs:
- Open the FastAPI Cloud dashboard.
- Go to Applications.
- Select your application.
- Open Journals.
This is useful for checking that your application is working correctly, detecting API errors, and debugging issues after deployment.
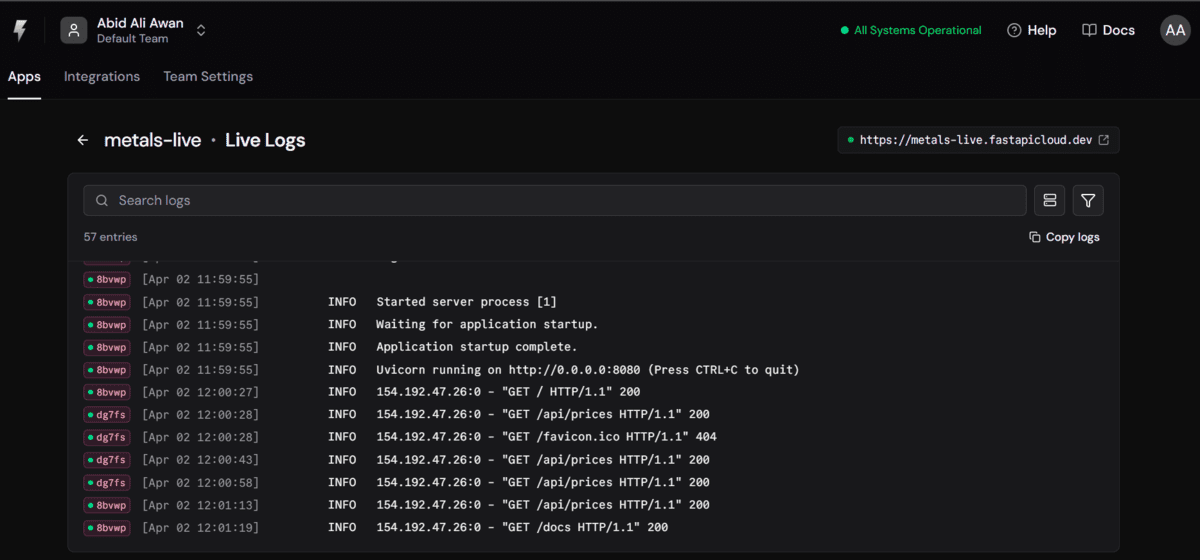
Photo by the author
FastAPI Cloud is also starting to feel closer to platforms like Supabase Or Vercelwith managed hosting, rapid CLI-based deployment, and additional integrations you can connect to your application as you grow.
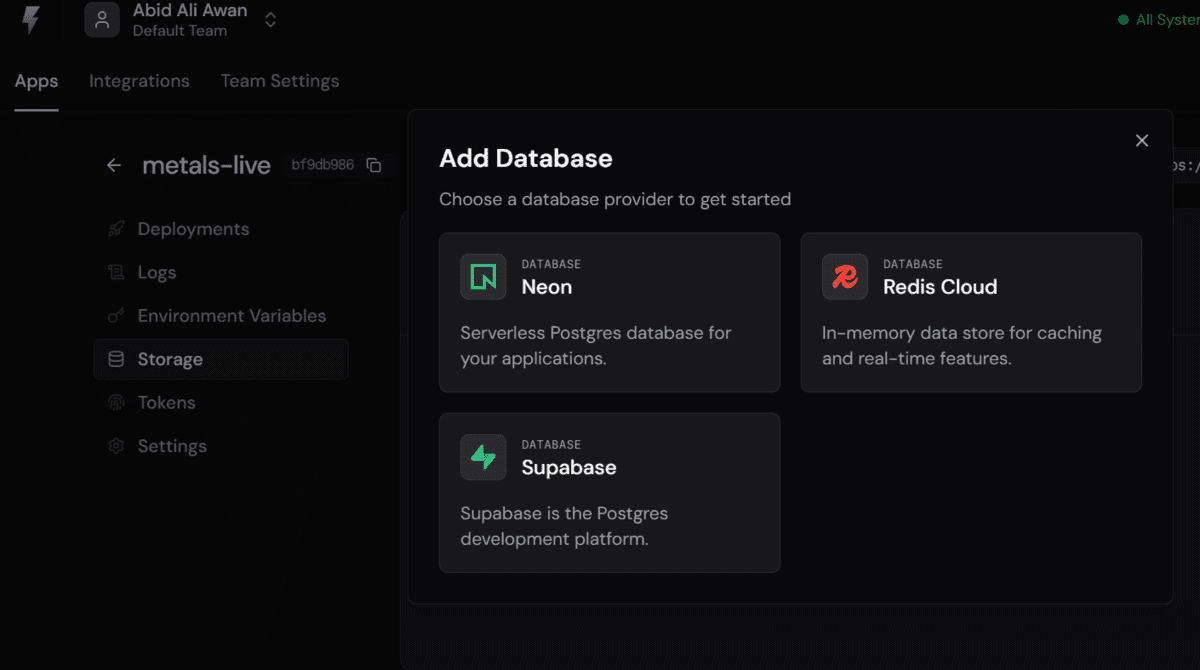
Photo by the author
# Summary
FastAPI Cloud makes it basic to take your diminutive FastAPI application from on-premises development to live deployment. In this guide, we built a basic Live Metals dashboard, tested it locally, deployed it with a single command, and checked the logs after launch.
For the first implementation, the workflow is basic and a good introduction to the FastAPI Cloud experience.
Abid Ali Awan (@1abidaliawan) is a certified data science professional who loves building machine learning models. Currently, he focuses on creating content and writing technical blogs about machine learning and data science technologies. Abid holds a Master’s degree in Technology Management and a Bachelor’s degree in Telecommunications Engineering. His vision is to build an AI product using a graph neural network for students struggling with mental illness.