
Photo by the author
# Entry
I have been looking for an alternative to OpenClaw not because it is unusable, but because it can seem too hefty and bloated for straightforward everyday utilize. I wanted something lightweight, straightforward to set up and straightforward to connect to WhatsApp without too many complicated steps. That’s when I stumbled upon it Nanobot on GitHub and I also noticed that a lot of people started talking about it on YouTube.
In this tutorial, we will discuss the Nanobot architecture and how it works. We will then walk you through the installation, configuration and connection process in six straightforward steps WhatsApp so you can start using it as a 24/7 artificial intelligence (AI) agent for a wide range of tasks.
# Using Nanobot as the first AI agent
Nanobot is an excellent choice for your first AI agent because it provides straightforward setup while still supporting real-world features. It can connect to messaging platforms such as WhatsApp, Telegram, Slack, Discord, Feishu, QQ, and email while interoperating with a wide range of model providers and Model Context Protocol (MCP) tool servers. This provides beginners with a clear way to understand the structure of an agent without having to start with a system that seems overly complicated.
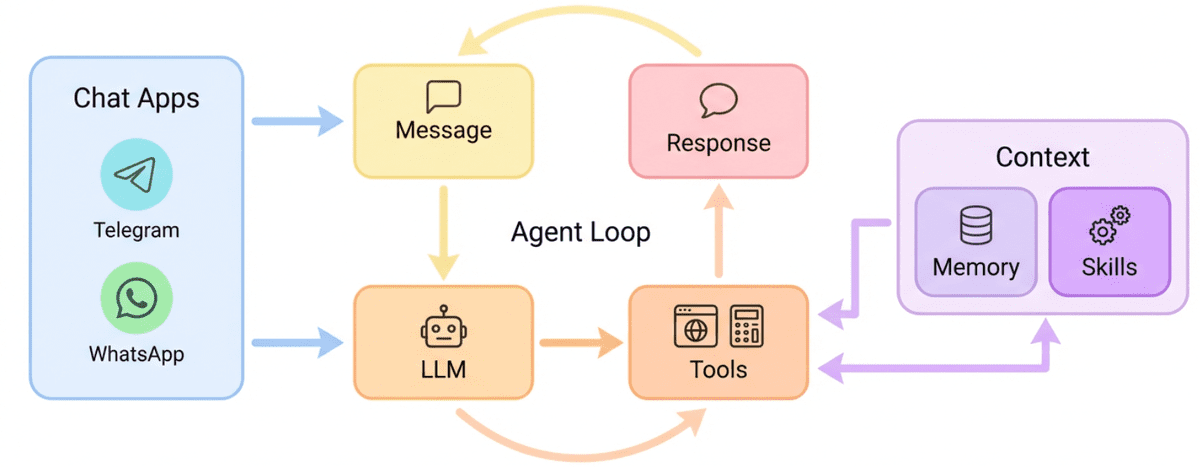
Nanobot Architecture | Image from HKUDS/nanobot
It also stands out as an alternative to OpenClaw because it offers practical integrations and everyday usability from the start. In addition to messaging channels, it supports tool invocation, web search, scheduled tasks, voice transcription, real-time progress streaming, and multiple provider options, making it straightforward to turn it into a useful personal assistant rather than just a demo project.
# Step 1: UV installation
Install first UVthat Nanobot uses to manage its Python environment and dependencies. Then confirm that it has been installed correctly by checking the version.
curl -LsSf https://astral.sh/uv/install.sh | shCheck installation:
Exit:
uv 0.10.9 (f675560f3 2026-03-06)# Step 2: Installing Nanobot
Once uv is installed, utilize it to install the Nanobot package. This will add the Nanobot Command Line Interface (CLI) so you can run it directly from the terminal.
uv tool install nanobot-ai
# Step 3: Initializing the Nanobot Project
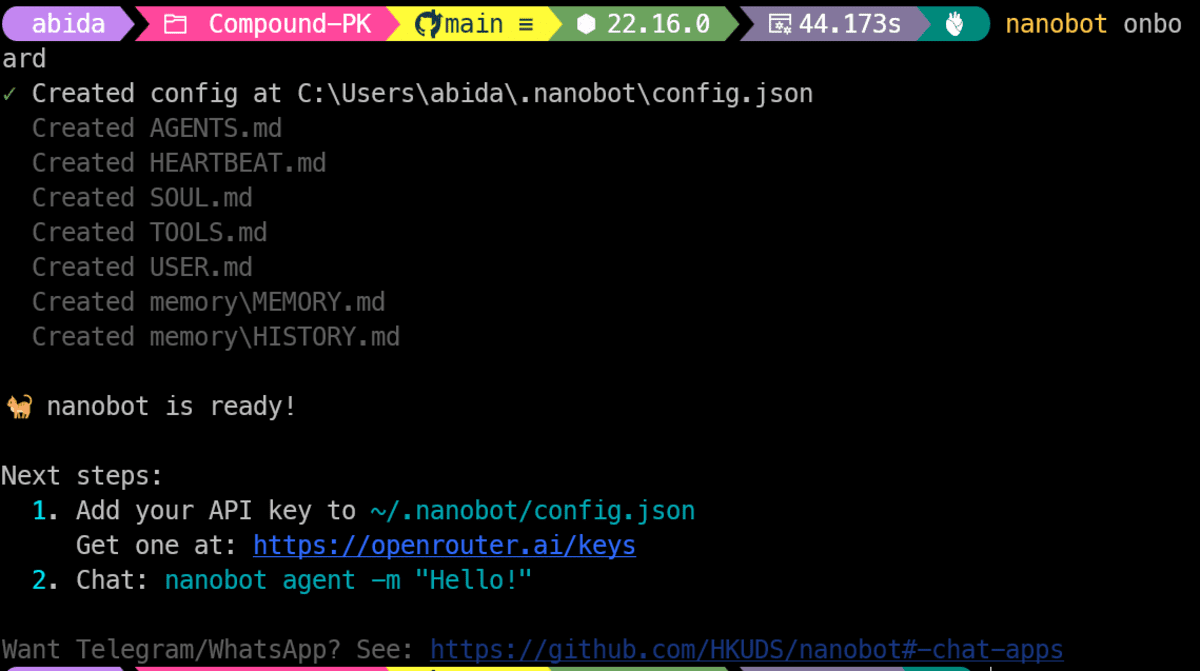
Then run the onboarding command to initialize the Nanobot.
This will create a basic local configuration, including a default configuration directory at ~/.nanobot and the workspace that Nanobot uses to store its files. After this step, Nanobot is ready to configure the supplier, model and channel.
# Step 4: Adding the Nanobot configuration
Go to yours ~/.nanobot/config.json file, then copy and paste the configuration below. Before saving, replace the placeholder values with your own OpenAI API key, model and WhatsApp number.
{
 "providers": {
   "openai": {
     "apiKey": "sk-REPLACE_ME"
   }
 },
 "agents": {
   "defaults": {
     "model": "openai/gpt-5.3-codex",
     "provider": "openai"
   }
 },
 "channels": {
   "whatsapp": {
     "enabled": true,
     "allowFrom": ["1234567890"]
   }
 }
}
Before saving, edit:
apiKeyusing a real OpenAI API keymodelif you want to utilize other modelallowFromwith your own WhatsApp number
One vital note – recent Nanobot releases show that WhatsApp allowFrom the formatting can be a bit inconsistent in practice, with some users reporting that it works better without the “+” sign, depending on their specific setup.
# Step 5: Connecting Nanobot to WhatsApp
Before starting the WhatsApp login process, make sure that Node.js AND above sea level are installed on your computer because WhatsApp Bridge runs on a node-based process.
First, start the login process in one terminal:
nanobot channels login whatsapp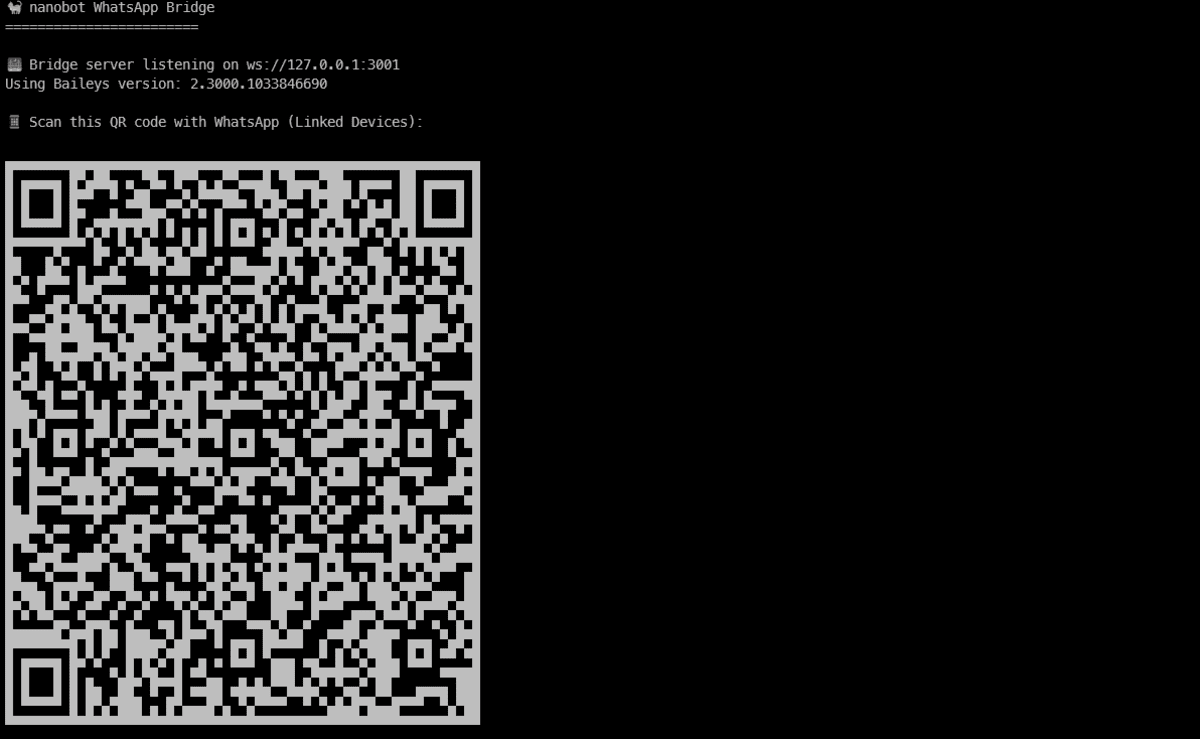
This will generate a QR code that you need to scan from WhatsApp → Settings → Connected devices on your phone. Once your device is connected, open the second terminal and launch the Nanobot Gateway:
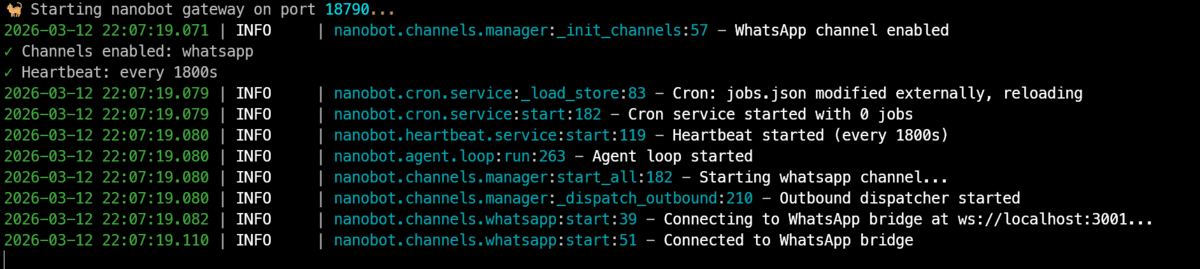
This is the process of keeping the channel operational so that Nanobot can receive and reply to WhatsApp messages.
# Step 6: Testing the AI agent on WhatsApp
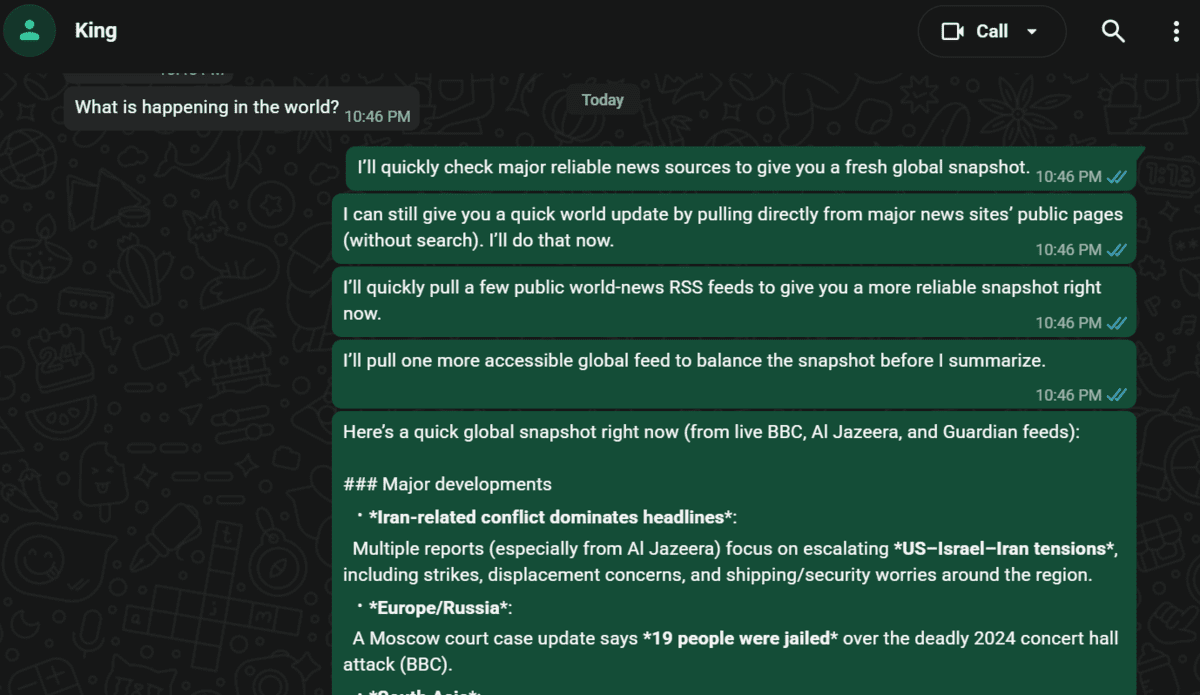
You will need a second phone to test the agent. This second phone number should already be added to allowFrom list in configuration file. When you send a message to the first phone number connected to the Nanobot, it should respond via WhatsApp.
In this example, the prompt asks what is happening in the world. Nanobot then processes the request, performs a web search if tools are enabled, and returns a detailed snapshot based on the latest information.
When the gateway terminal is running, you can observe the full workflow of the agent in real time. This includes receiving the message, invoking the tools, generating the response, and sending back the response, making it straightforward to confirm that everything is working correctly.

# Final thoughts
Setting up Nanobot showed me that building a personal AI agent doesn’t have to be overly complicated, although it wasn’t completely seamless. I appreciated how quickly I was able to go from a terminal setup to a working agent connected to WhatsApp that provides actionable answers in practice.
However, I encountered a few minor obstacles. On Windows, if Node.js or npm was already installed in a certain configuration, the Python script sometimes did not detect npm correctly in the terminal, making the initial configuration a bit confusing. Additionally, WhatsApp’s lack of extensive documentation meant it wasn’t immediately obvious that the interface worked by sending messages directly to a connected device, rather than through a separate chat interface with a bot.
Despite these minor issues, Nanobot remains a sturdy starting point for anyone looking to build their first AI agent. It provides a basic agent experience without the overhead of heavier alternatives. Once the setup is up and running, its value becomes immediately apparent, bridging the gap between straightforward terminal commands and a truly helpful personal assistant.
Abid Ali Awan (@1abidaliawan) is a certified data science professional who loves building machine learning models. Currently, he focuses on creating content and writing technical blogs about machine learning and data science technologies. Abid holds a Master’s degree in Technology Management and a Bachelor’s degree in Telecommunications Engineering. His vision is to build an AI product using a graph neural network for students struggling with mental illness.